
Many professional chimney flue sweeps are now abandoning the traditional hand sweeping method to using a rotary system. Not surprisingly, as it is less physical, faster to use and one rotary nylon flail head fits all flue sizes.
However, many flue liner manufacturers do not recommend rotary sweeping, even by trained sweeps.
We now see more DIY home owners opting to use rotary as the market gets filled with ever cheaper and low quality rotary systems kits, manufactured in Asia.
I tested one of the more popular ‘budget’ rotary power sweeping kits that are sold on various platforms like Amazon and Ebay etc and found the connectors were just crimped fastened to the nylon rod (possible with/without additional adhesive bonding). One of the rod connectors detached from the rod, luckily it was at the drill end and not a rod up the flue, which would have been very problematic. Only better quality rotary rods have a combination of one or more metal pins (rivet or screw), crimped and adhesive bonding.
The higher quality kits tend to be too expensive for DIY sweeps.
These are a few disadvantages of using rotary power sweeping:
- You have very little tactile based feedback from the rods on the extent of debris on the liner wall.
- They can leave soot on bends and horizontal surfaces.
- A partial blockage could be missed due to the small size of the head.
- Having to struggle with fiddly locking pins to connect and disconnect the rods.
- Last but most importantly, is the excessive abrasion and potential tearing caused form high rotary drill speeds when the metal rod connectors come in contact with the inside liner wall on any bends.
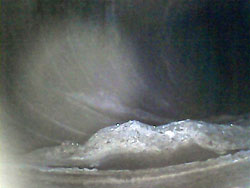
The only way to check liner damage or failure, is using a borescope camera tool or less accurately by smoke testing. Any HETAS approved engineer can offer this service.
Damaged (torn) liner caused from repeated contact by chimney rods with metal components.
[Borescope camera going up the flue liner. Sent to me by a customer].

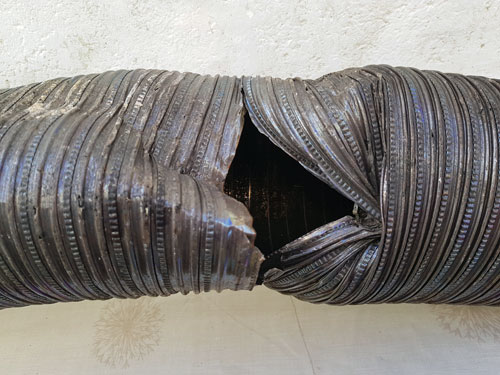
The failed liner below was caused by repeated use of the wrong type of rods.
Initially the metal part of the rods catching on the inner liner and then over time eventually ripping through both layers.
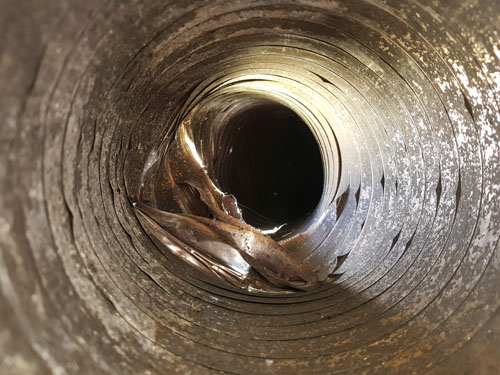
Evidence of a flue fire, identifiable from the extreme heat discolouring of the liner metal.
All flexible steel flue liners are twin walled. A sticky acidic creosote-like substance, created by water vapour combining with gas particle going up the flue, will corrode the flue liner from the inside out. This is why smoke tests can be inconclusive if it is only the inner wall that has failed.
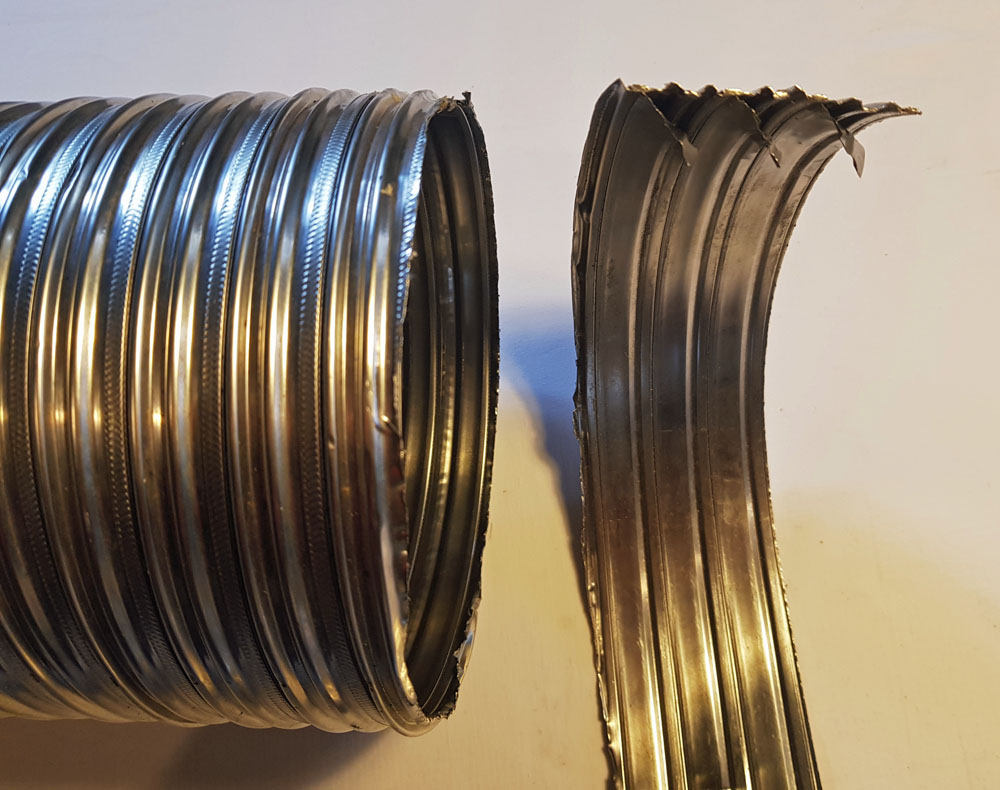
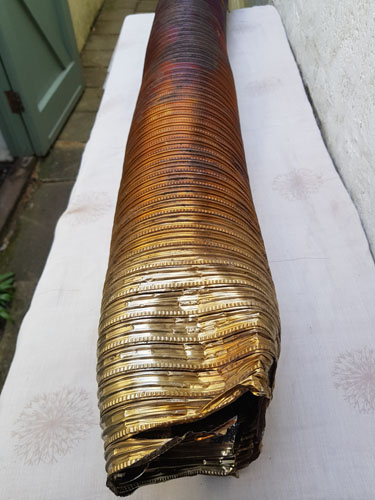
This new 6″ liner has been cut to show a section through the twin wall. The inner wall (3 loops, top of photo) have been peeled back from the outer wall, 0.23mm, only ten times thicker than kitchen foil. Hence the importance of using all nylon rods.
It is constructed from two continuous strips of stainless steel sheet which is fed through a machine with profile form wheels which create the convolutions. When the material is fed round a mandrel, the strips overlap creating the ‘spiralled’ flexible flue liner.
Hand sweeping with traditional brush is a cost effective and easy to use solution bay far the best option for DIY sweeps. Sweeping on a regular basis will eliminate the need to use aggressive rotary rods that risk reducing the life of your liner.
Correct technique and a quality spiral brush is all that is required to maintain the flue liner in tip-top condition.
A clean flue ensures maximum efficiency from the furnace, so less firewood needed to produce the same amount of heat and thus lower expense on firewood.
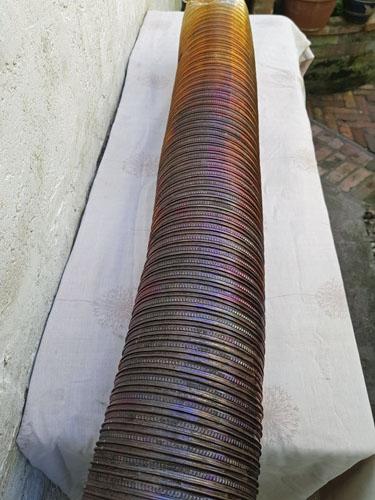
There is a significant long term cost saving in buying your own set of sweeping rods, even if you only have one wood burner in your home.
Flexi Chimney Rods are the only company (in the world) that manufacture ‘all nylon’ chimney hand sweeping rods which use nylon rod connectors instead of metal ones. Definitely an innovative solution to achieve peace of mind on prolonging the life of the flue liner.
Smoke test pellets are a simple way of safety testing your wood burner and flue system. After you have swept the flue, to clear any soot which could block existing holes in the liner, a ‘type 2’ smoke test can be undertaken. A pack of 6x5g smoke pellets cost about £2.50 and burn for 30 to 60 seconds (choice of colours such as grey or orange – bright colours being more visible on cloudy days).
This will test several things; the operational safety of the stove (minimizing the risk of carbon monoxide in the room), whether the flue system has an adequate draught and for any leaks in the flue liner.
Firstly close all doors, window and wall air vents in the room. Preheat the wood burner for 5-10 minutes with some crumpled paper or small amount of kindling, with the door air vent open. Place one smoke pellet in the wood burner; ignite at arm’s length wearing a glove. Close the wood burner door. Check for any signs of smoke leakage: around the stove itself, stove pipe, any fittings and from under the register plate. Check if the up draught is weak or slow. Open an external window and see if the smoke velocity increases, indicating inadequate room ventilation. If your liner is fitted within a traditional brick chimney, you need to check it has not failed, so inspect any upstairs rooms with feature fire places or closed off fire places with a chimney vent. Also check the loft space for signs of smoke. Next go outside (binoculars are best) and check the smoke is only exiting through the correct pot and not any of the mortar joints in the chimney stack.
