
How to sweep your chimney flue liner
Why it is necessary to sweep the wood burner chimney flue properly
Removing as much of the waste material generated from burning wood: smoke particles, soot and creosote, is very important.
Water vapour combines with other gases and particles going up the chimney and unless the chimney is warm, the condensation forms a creosote-like substance which hardens to form tar on the surface of chimney liner. Moisture in the logs cause the chimney to cool and so condensation occurs and a residue is formed. This residue is brown or black and can be flaky, sticky, runny, tar-like or hardened and will sometimes be all of these in the same flue. This volatile residue can build up and ignite causing a dangerous chimney fire.
Excessive condensation from damp logs which normally forms in the upper part of the chimney is acidic in nature and will corrode the inner surface of a steel flue liner, eventually leading to perforation and failure of the liner. Sufficient build up of deposits will reduce its draw and furnace efficiency plus make smoke.
Sweeping the flue liner
Set up your workspace around the (cold) wood burner, remove any items of clutter and cover the floor area with a suitable drop sheet: old curtains, bed sheets, heavy duty decorator’s drop cloth etc.
Gather all the tools you need to hand: chimney rods, brush, empty bucket to put parts in, gloves, safety glasses, dust mask, masking tape, plastic dust sheet, brush and pan, wet & dry vacuum cleaner (wrap a damp cloth around the exhaust outlet to trap excess soot dust).
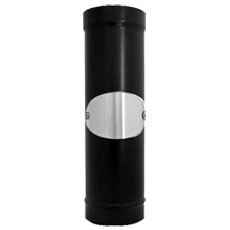
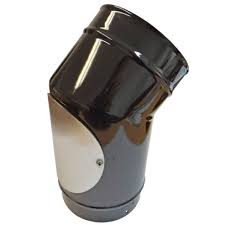
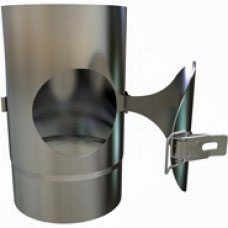
If you have an access door in the stove pipe, remove the cover plate and make sure to keep the wood burner door closed during sweeping. You can if you want use a damp cloth over the opening as you operate the rods – then skip to the next paragraph. If not then you will need to take out the baffle plate (be careful it will have a layer of soot on it), the fire bricks and the log retainer bar. Place them all in the bucket for cleaning outside. Tape up the plastic dust sheet across the top of the wood burner entrance. You can either cut a slit for feeding the brush and rods through and tape all round or feed them in from under the bottom of the draped plastic sheet.
Examples of stove pipe access doors:
Connect the brush to the first chimney rod and feed it slowly into the stove pipe. Continue to attach further rods as you proceed up the flue. It is not necessary to rotate the brush as you sweep, the spiral mounted bristles work fine.
Do not try to ‘push and pull’ the rods as you go up or down the flue because the bristles are oversized for the flue diameter, so are designed to bend back putting pressure on the flue liner wall. If the brush has a guide ball, a few rotations of the chimney rod (clockwise only for threaded rods) can help it slide pass tighter bends.
You should have reached the chimney pot or cowl cap with about 0.5 M of the last chimney rod to spare for retrieving all the rods. Go outside (tradition is to make a wish first) and check you can see the brush.
Carefully and smoothly pull the rods back down, disconnecting them as you go, to avoid unnecessary soot spillage.
It just remains to sweep up the collected soot debris from inside the stove and any connecting pipe sections with the hand brush. Final clean up with the vacuum cleaner, re–assemble the clean components inside the wood burner. Wipe down the rods and clean the brush head before storing.
You don’t have to pay for a chimney sweep (unless your home insurance specifically requires it e.g. thatched roofs).
After a couple of sweeps you will be fully competent and capable to proficiently do this job yourself. Standard home insurance policies ask that customers verify their property is in a good state of repair and of good build when they apply for home insurance. Schedule a minimum of sweeping the flue twice each year, before and at the end of every winter use. You could always have it done professionally, say every 3rd year, for peace of mind.
Smoke test pellets are a simple way of safety testing your wood burner and flue system. After you have swept the flue, to clear any soot which could block existing holes in the liner, a ‘type 2’ smoke test can be undertaken. A pack of 6x5g smoke pellets cost about £2.50 and burn for 30 to 60 seconds (choice of colours such as grey or orange – bright colours being more visible on cloudy days).
This will test several things; the operational safety of the stove (minimizing the risk of carbon monoxide in the room), whether the flue system has an adequate draught and for any leaks in the flue liner.
Firstly close all doors, window and wall air vents in the room. Preheat the wood burner for 5-10 minutes with some crumpled paper or small amount of kindling, with the door air vent open. Place one smoke pellet in the wood burner; ignite at arm’s length wearing a glove. Close the wood burner door. Check for any signs of smoke leakage: around the stove itself, stove pipe, any fittings and from under the register plate. Check if the up draught is weak or slow. Open an external window and see if the smoke velocity increases, indicating inadequate room ventilation. If your liner is fitted within a traditional brick chimney, you need to check it has not failed, so inspect any upstairs rooms with feature fire places or closed off fire places with a chimney vent. Also check the loft space for signs of smoke. Next go outside (binoculars are best) and check the smoke is only exiting through the correct pot and not any of the mortar joints in the chimney stack.
